Mini Hamburguesas / Mini hamburgers

Click for the English Version

Bueno, historia de ésta receta es simple: la vi en Tumblr y decidí adaptarla por que se me antojó. Aparte de eso, después de un par de días ganó la guerra de Mini Hmburguesas VS Soufflé de Red Velvet que posteé en mi Facebook.
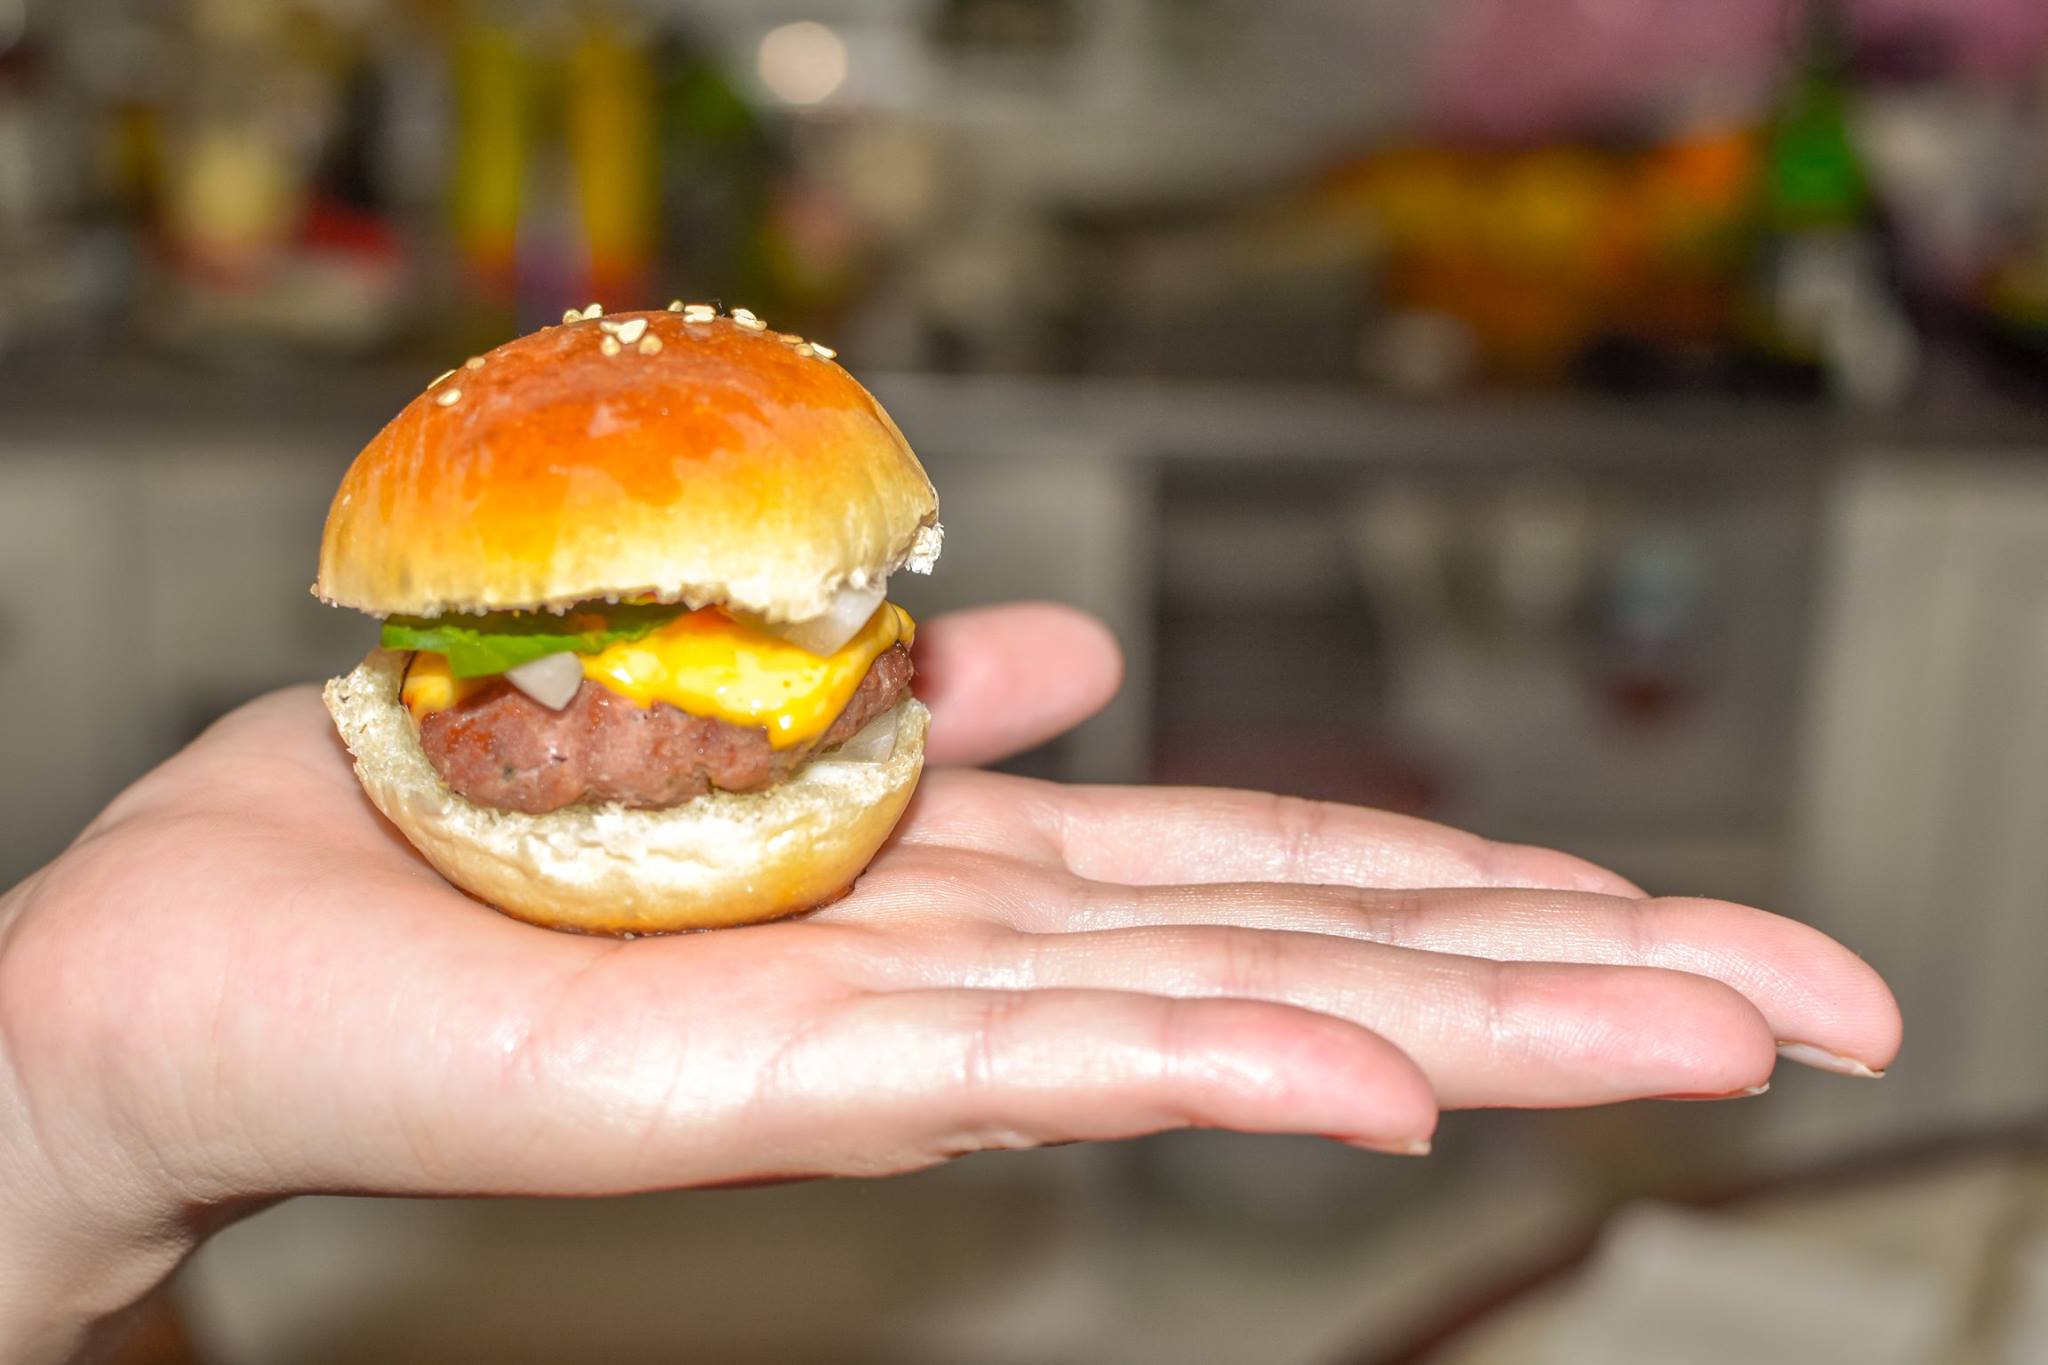
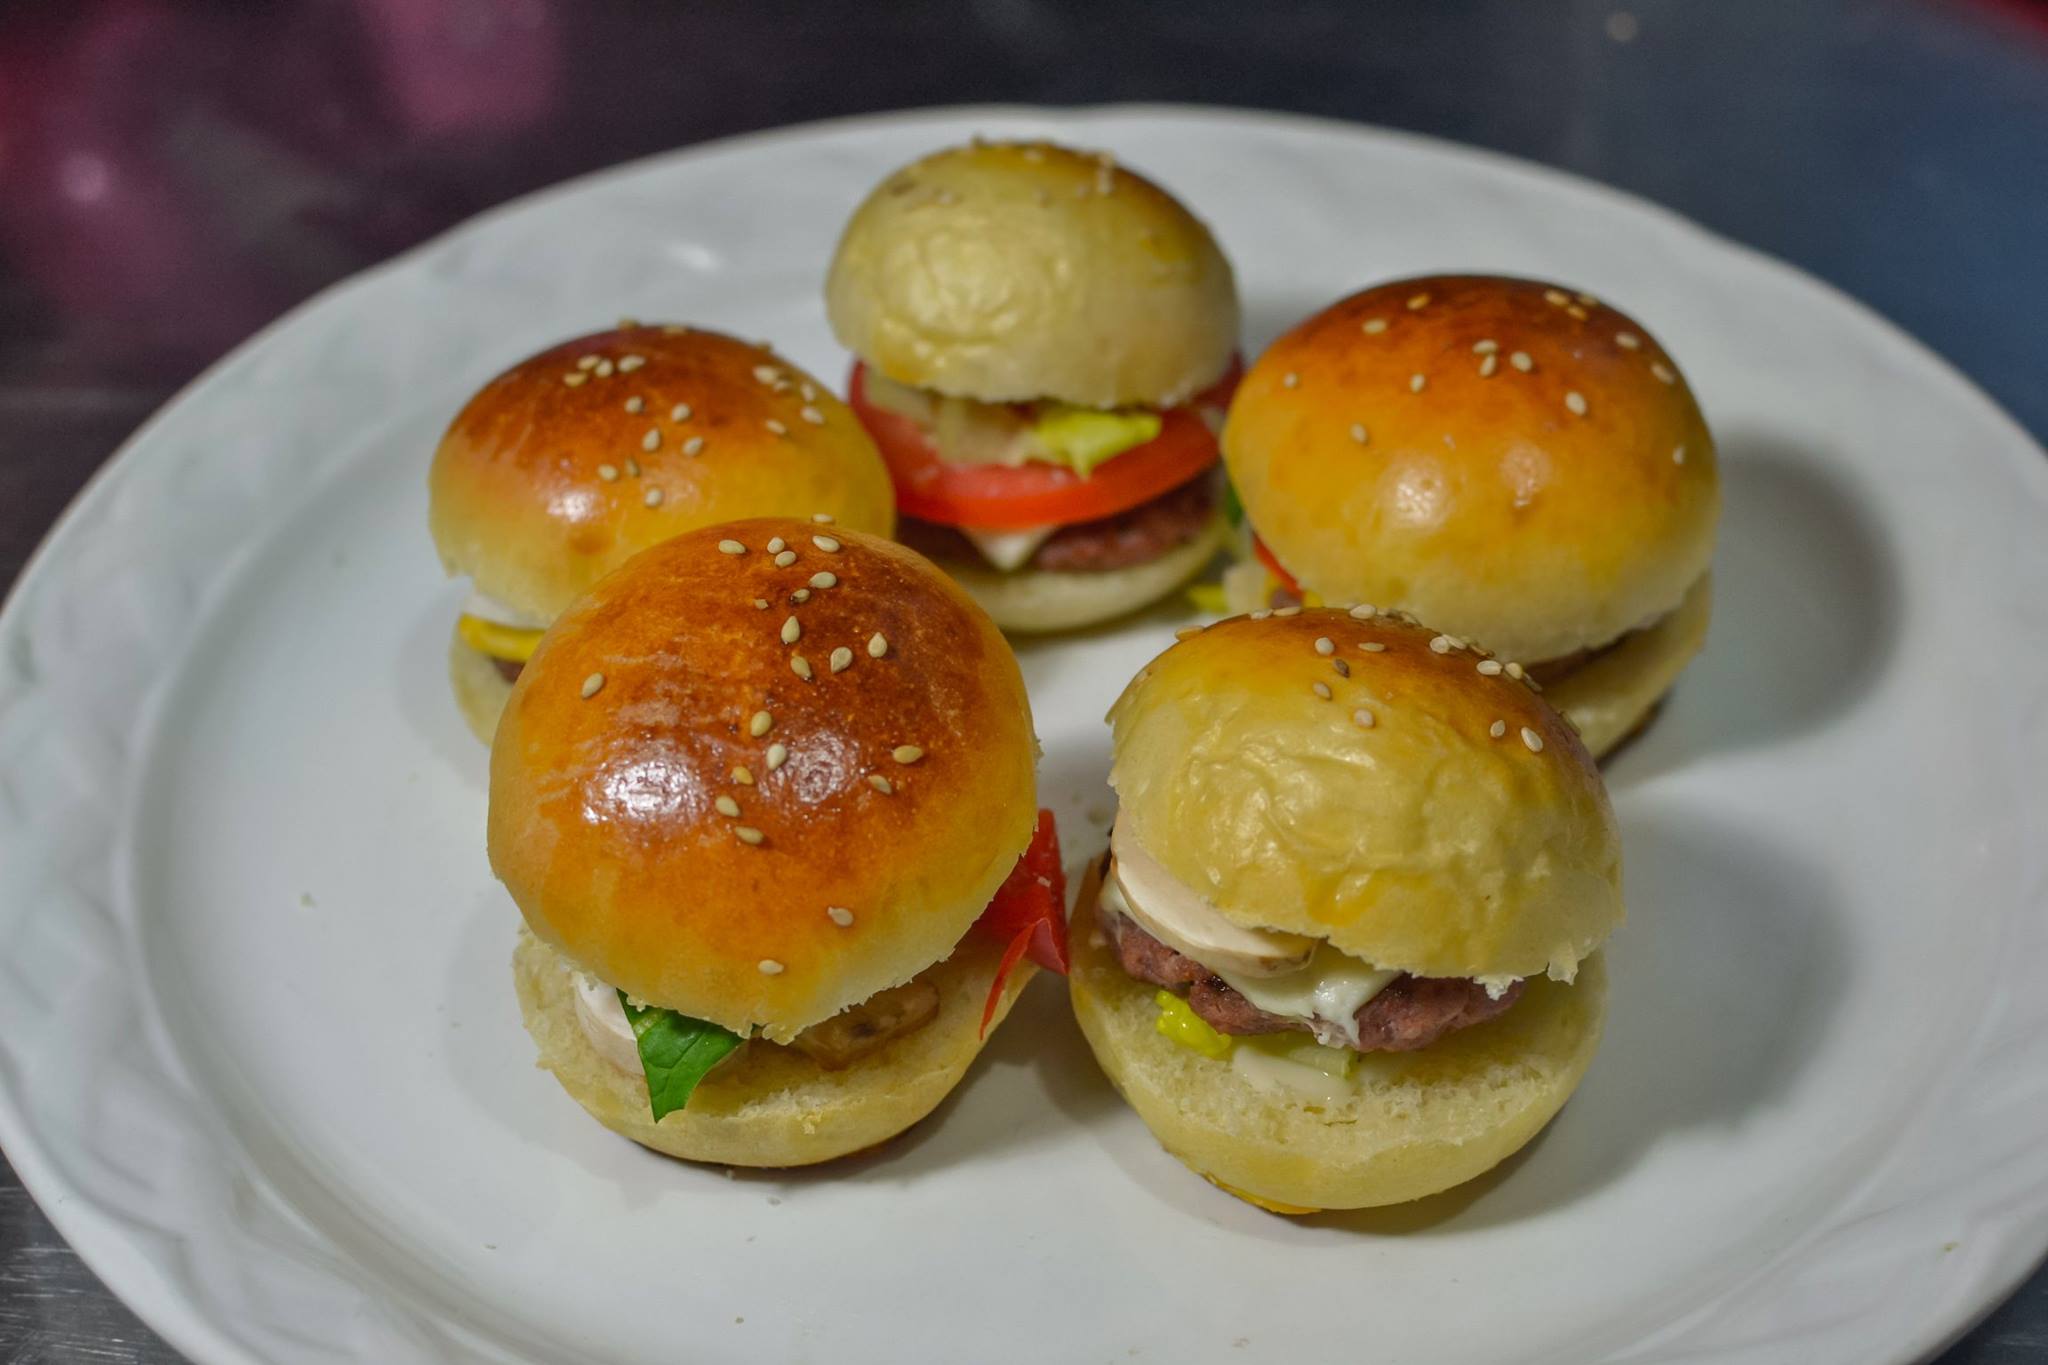
11088865_10153669360023496_347098831_o

Son pequeñas.

Si hablas inglés, te dejo un vídeo para que te des ideas de cómo darle un giro interesante a tus hamburguesas; y otro video por si quieres aprender a hacer pepinillos. Si de verdad te gustan las hamburguesas exóticas, te dejo el link de un show acerca de hamburguesas realmente interesantes. Es una lástima que ya no lo produzcan, pero creo que vas a disfrutar los episodios que ya existen.

Lo más complicado de ésta receta es el pan. La masa de hamburguesas es una masa tipo Brioche, que es, en mi opinión, la más complicada. Es muy completa, y es bastante pegajosa. Recomiendo que no la hagas si no tienes experiencia previa de panadería. Para ésto tengo dos alternativas:

  • Usar los pequeños panecitos rellenos de queso que venden el el súper, cortándolos por la mitad.

  • Ir a una panadería local y pedir que te hagan los panes.
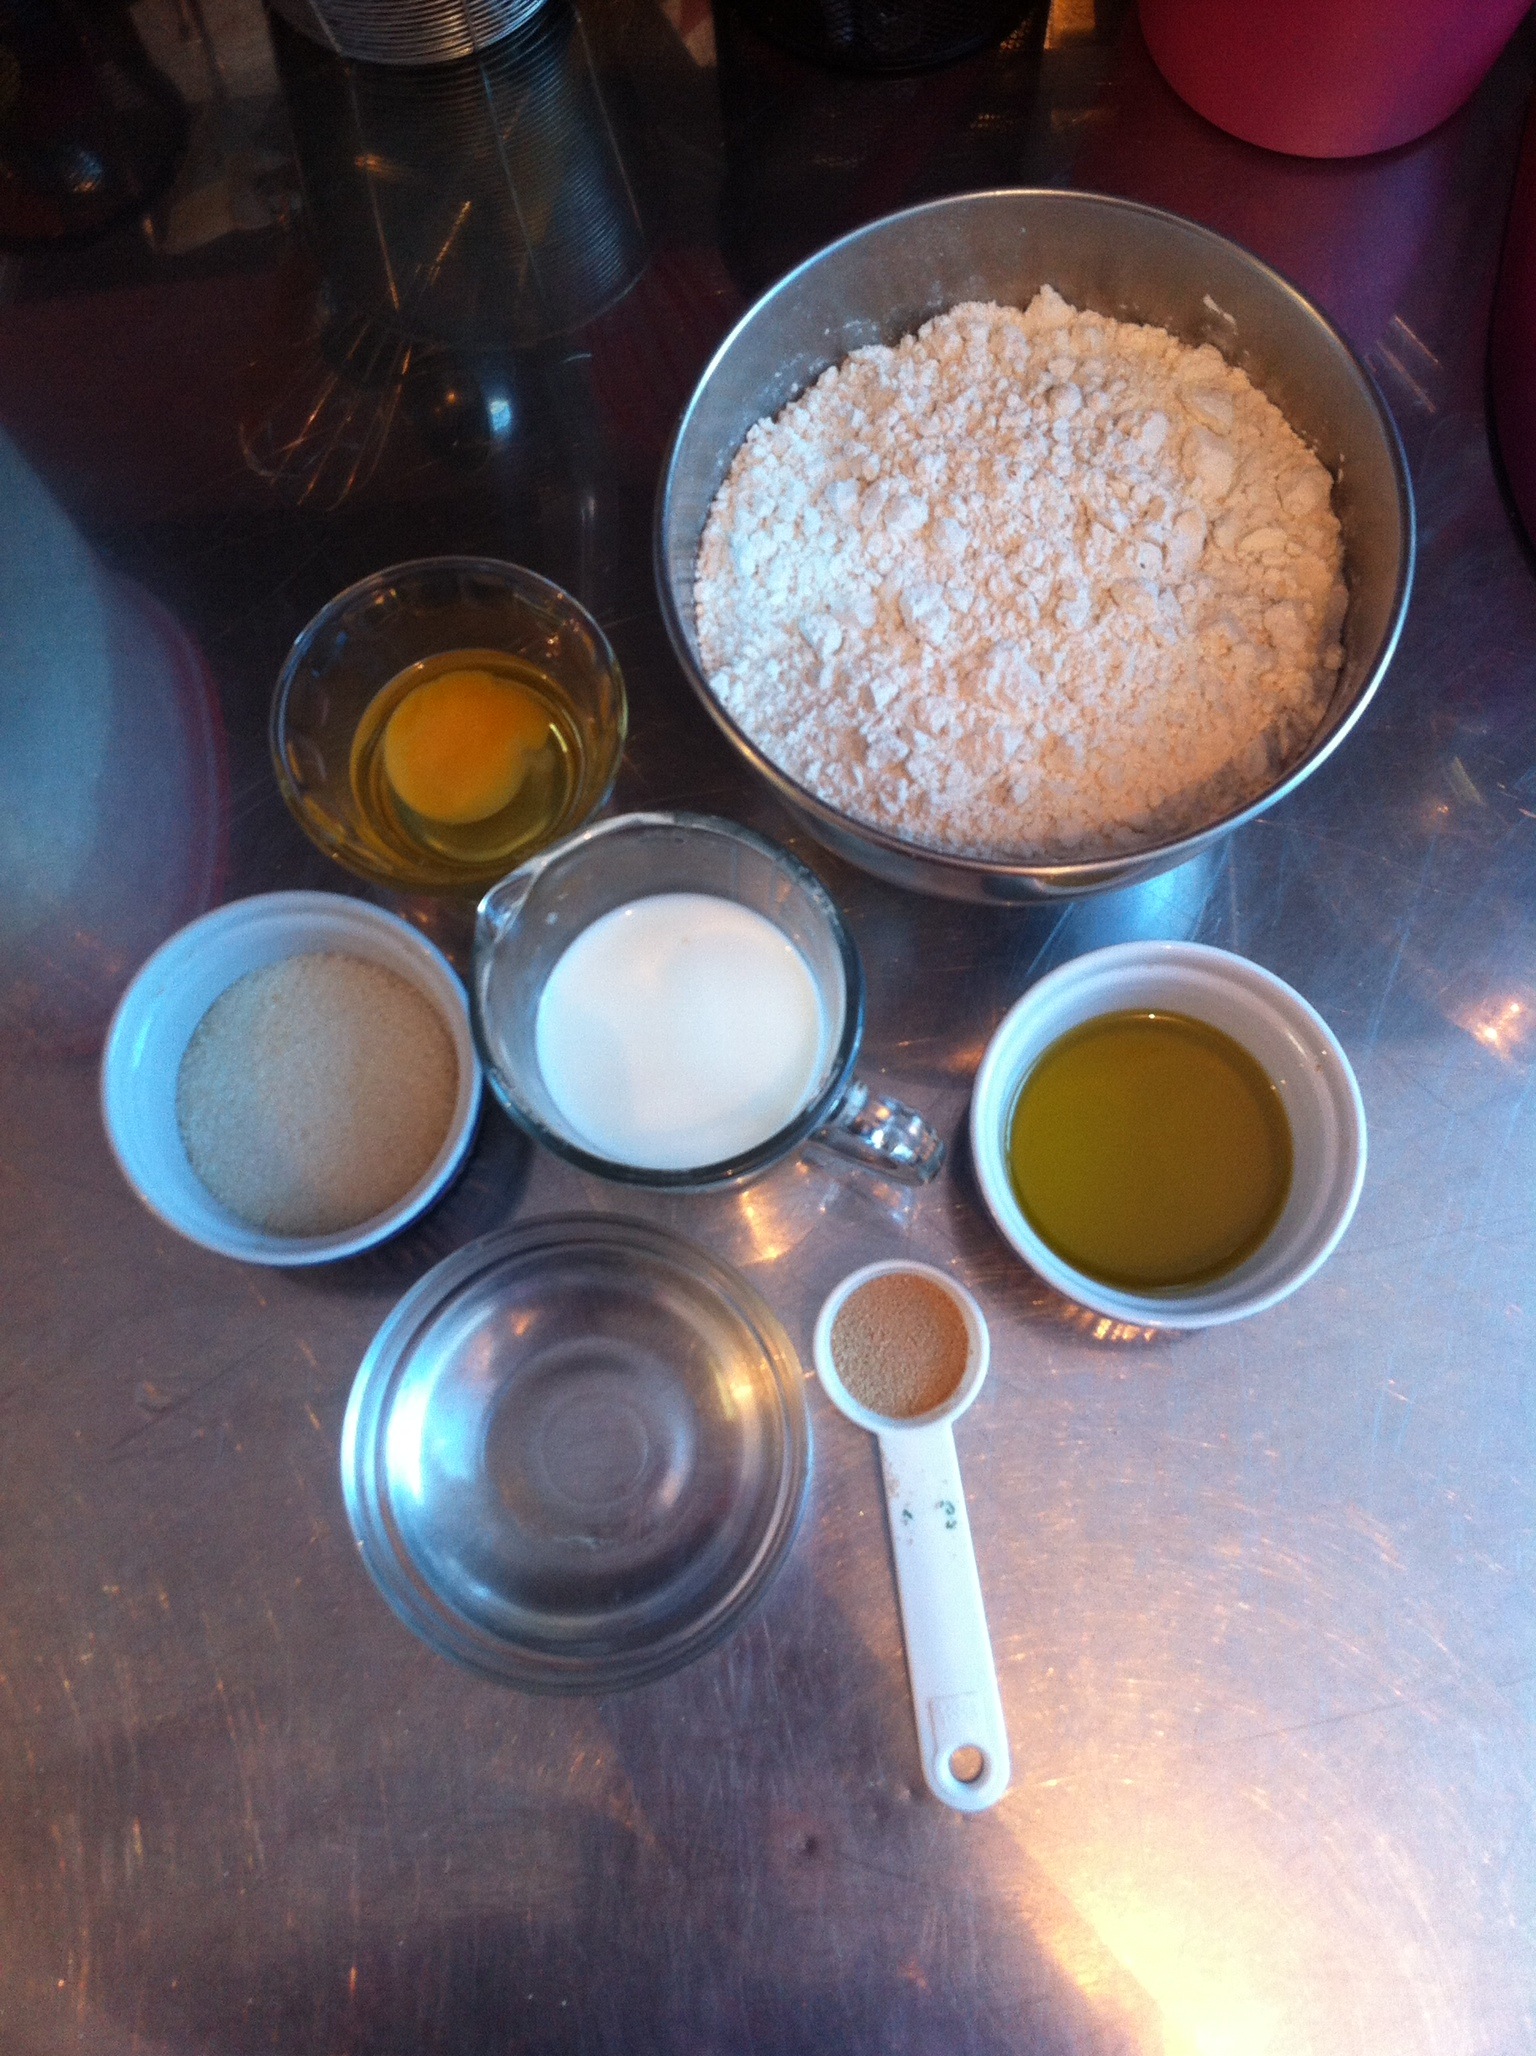
Ingredientes:

Pan:

  • 1 taza de harina (puedes llegar a usar hasta 2, dependiendo del clima)
  • 1/3 de taza de leche en polvo
  • 1 huevo
  • 45 ml de leche
  • 45 ml agua
  • 1 cucharadita de mantequilla
  • 2 cucharaditas de aceite de olivo
  • 1 cucharadita de sal
  • 1 cucharada de azúcar
  • 1 cucharada de levadura
  • Ajonjolí, al gusto
  • 1 yema (para barnizar)

Carne

  • 1/4 kg de carne molida de res
  • 1/4 kg de carne molida de cerdo
  • Cebolla picada finamente, al gusto
  • Albahaca, cebollín, perejil, cilantro o cualquier hierba de tu preferencia, al gusto
  • Sal al gusto
  • Pimienta al gusto
  • Cualquier otro sazonador en polvo. Puedes usar ajo en polvo, cebolla en polvo, alguna pimienta interesante (blanca, gorda, rosa)

Puedes hacer lo que yo hice (tomar el camino de los flojos) y comprar carne de hamburguesas ya preparada.

Te recomiendo que si haces ésto, compres carne de calidad, como la que venden en las carnicerías, no en el super. Las hamburguesas congeladas son raras, y se van a deshacer en cuanto intentes darles forma.

Si, por el contrario, eres una persona con muchos ánimos de vivir, busca carne con un buen contenido de grasa. La grasa le va a dar sabor a tus hamburguesas.

Guarniciones:

  • Pepinillos
  • Salsa de tomate
  • Mostaza
  • Mayonesa
  • Cebolla
  • Queso amarillo
  • Jitomate
  • Lechuga

Obviamente puedes usar lo que se te de la gana.

Instrucciones:

Pan:

1.- Calentar el agua, la leche y la mantequilla.

No calientes ésta mezcla más allá de los 60°C, eso mataría la levadura.

2.- Agrega el azúcar y mezcla perfectamente.

3.- Agrega la levadura, mezcla y deja descansar durante 5 minutos.

4.- Mezcla la leche en polvo, harina y sal.

5.- Agrega el huevo, la mezcla de leche e integra bien. Puedes hacerlo a mano o en batidora, con el gancho para pan.

6.- Vierte el aceite de olivo, integra bien y amasa por 10 minutos, o hasta que la mezcla esté lisa, y se despegue de tus manos.

Recuerda que ésta masa es bastante pegajosa, así que tendrás que juzgar la masa por qué tan lisa esté.

7.- Recubre un recipiente hondo con un poco de aceite y coloca tu masa. Agrega aceite para cubrirla toda y deja en un lugar cálido, sin corrientes de aire, durante dos horas o hasta que el tamaño de la masa se haya duplicado.

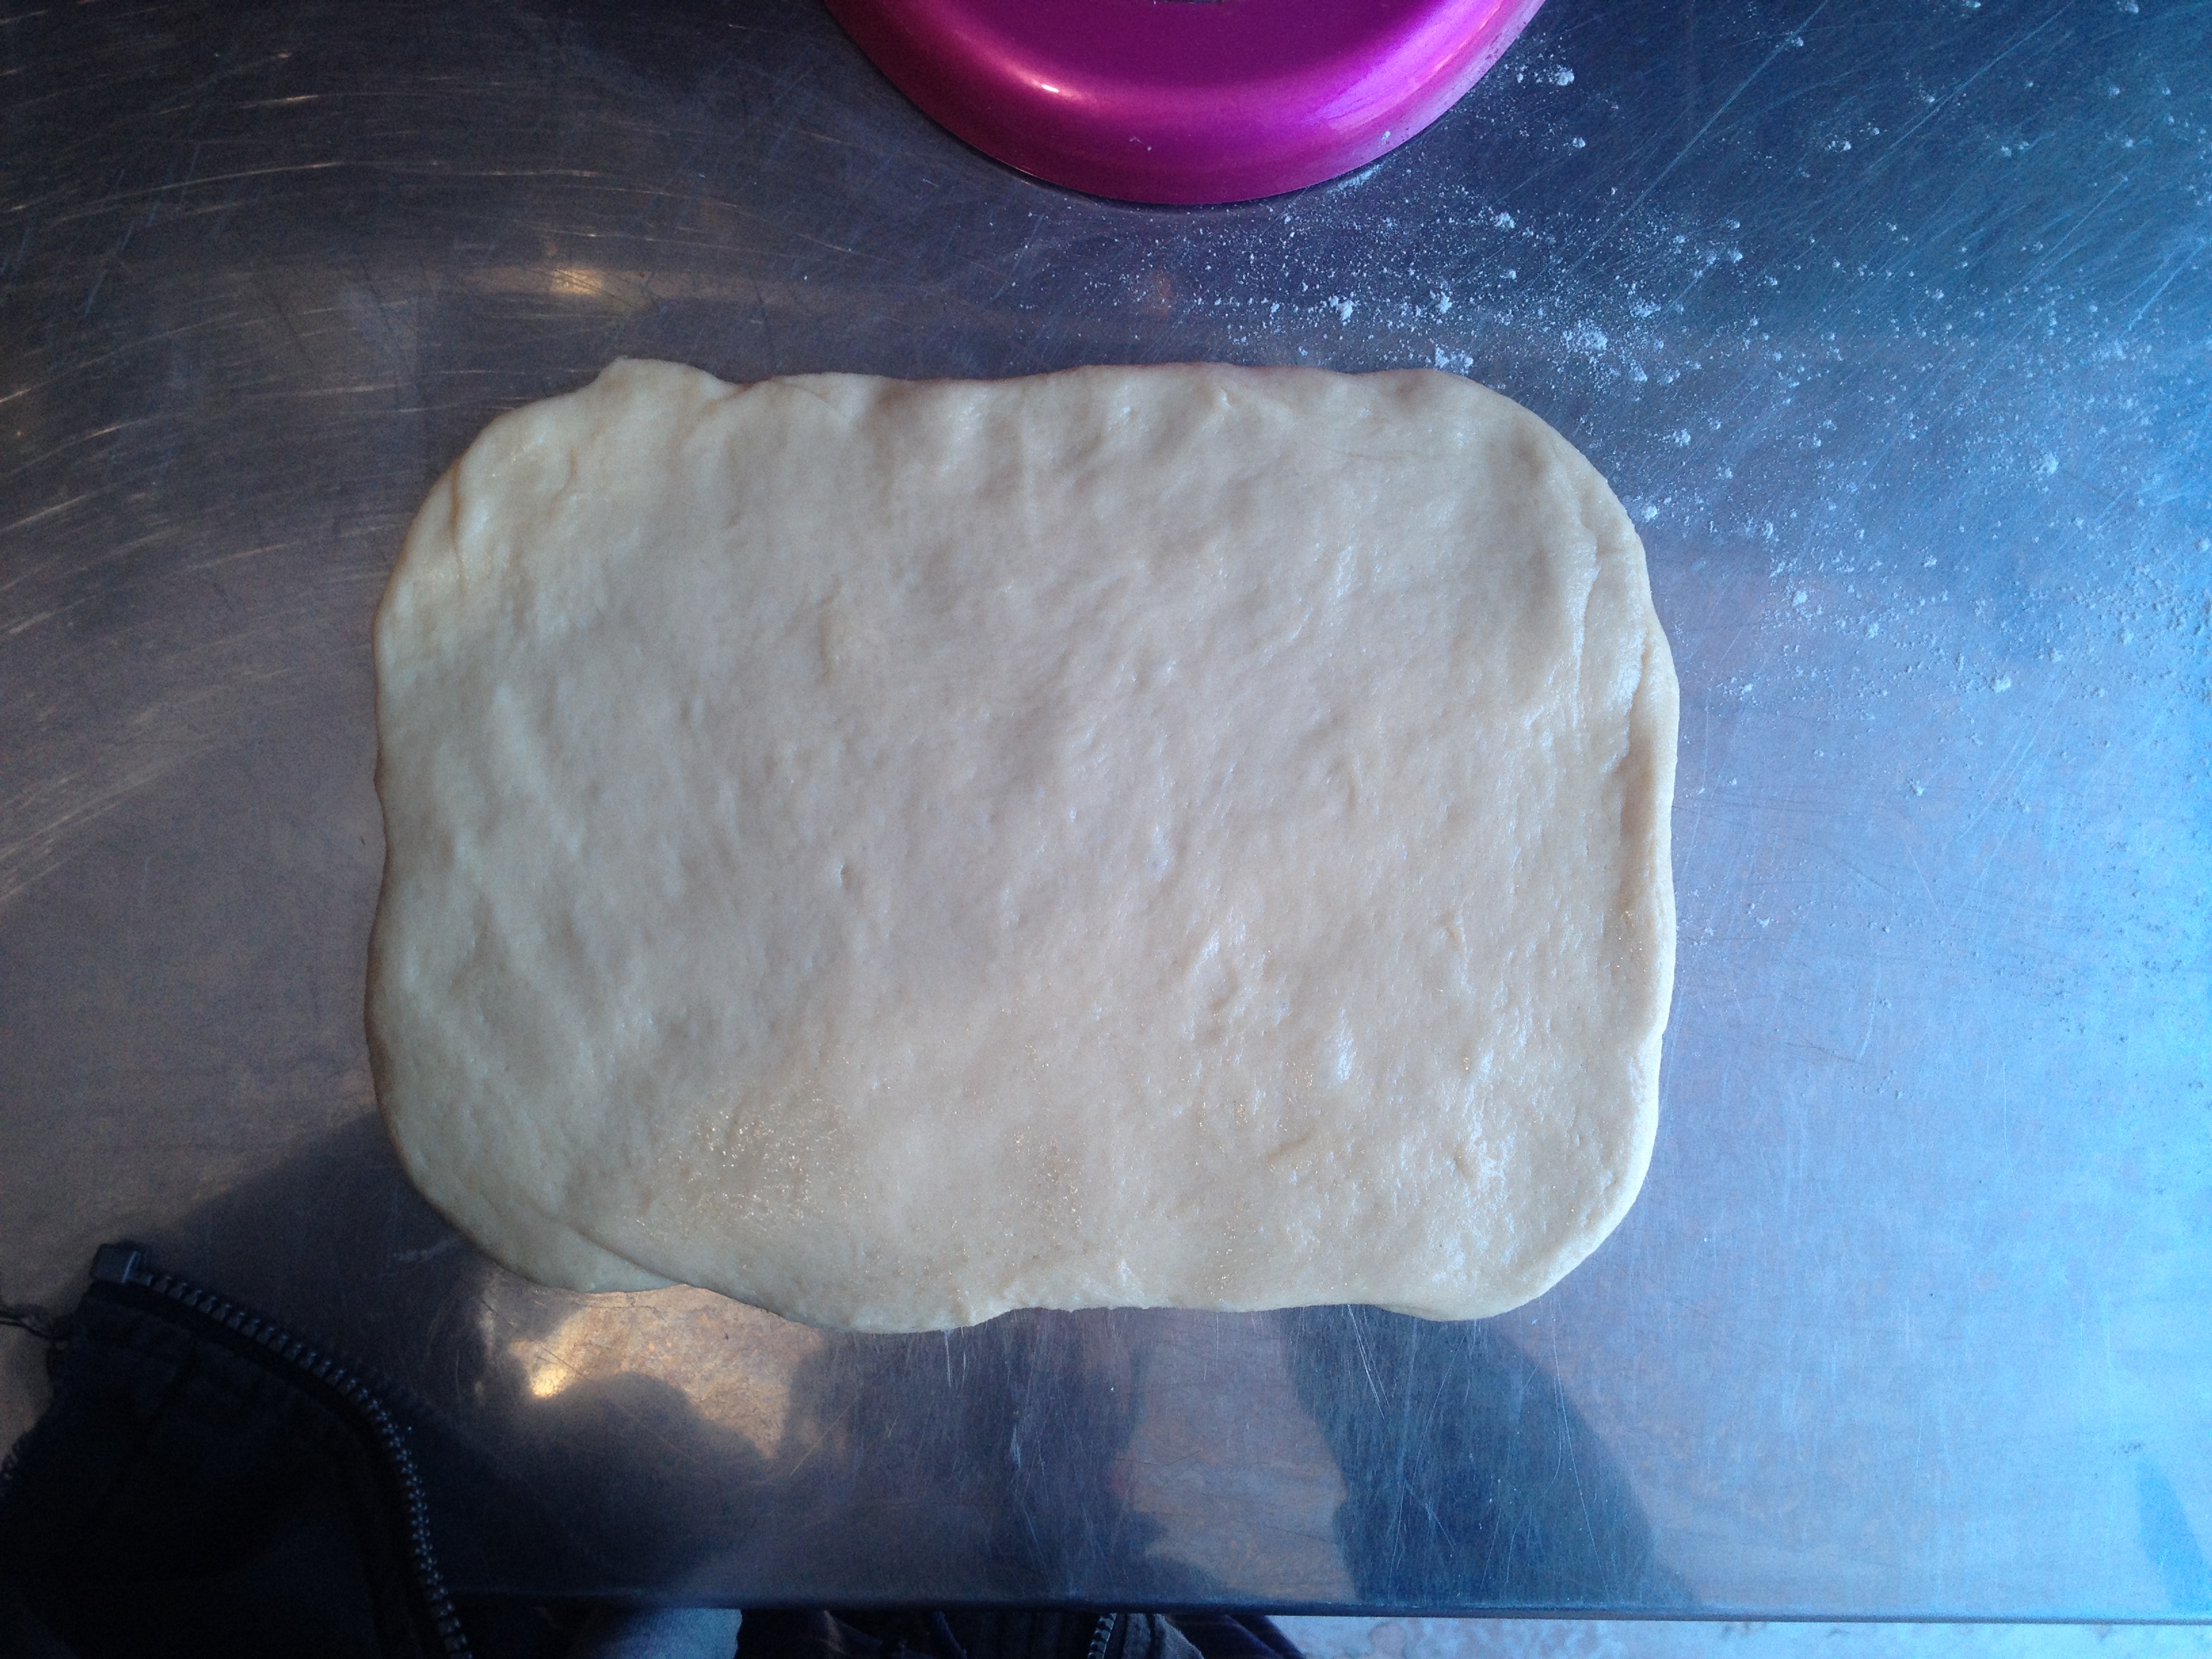
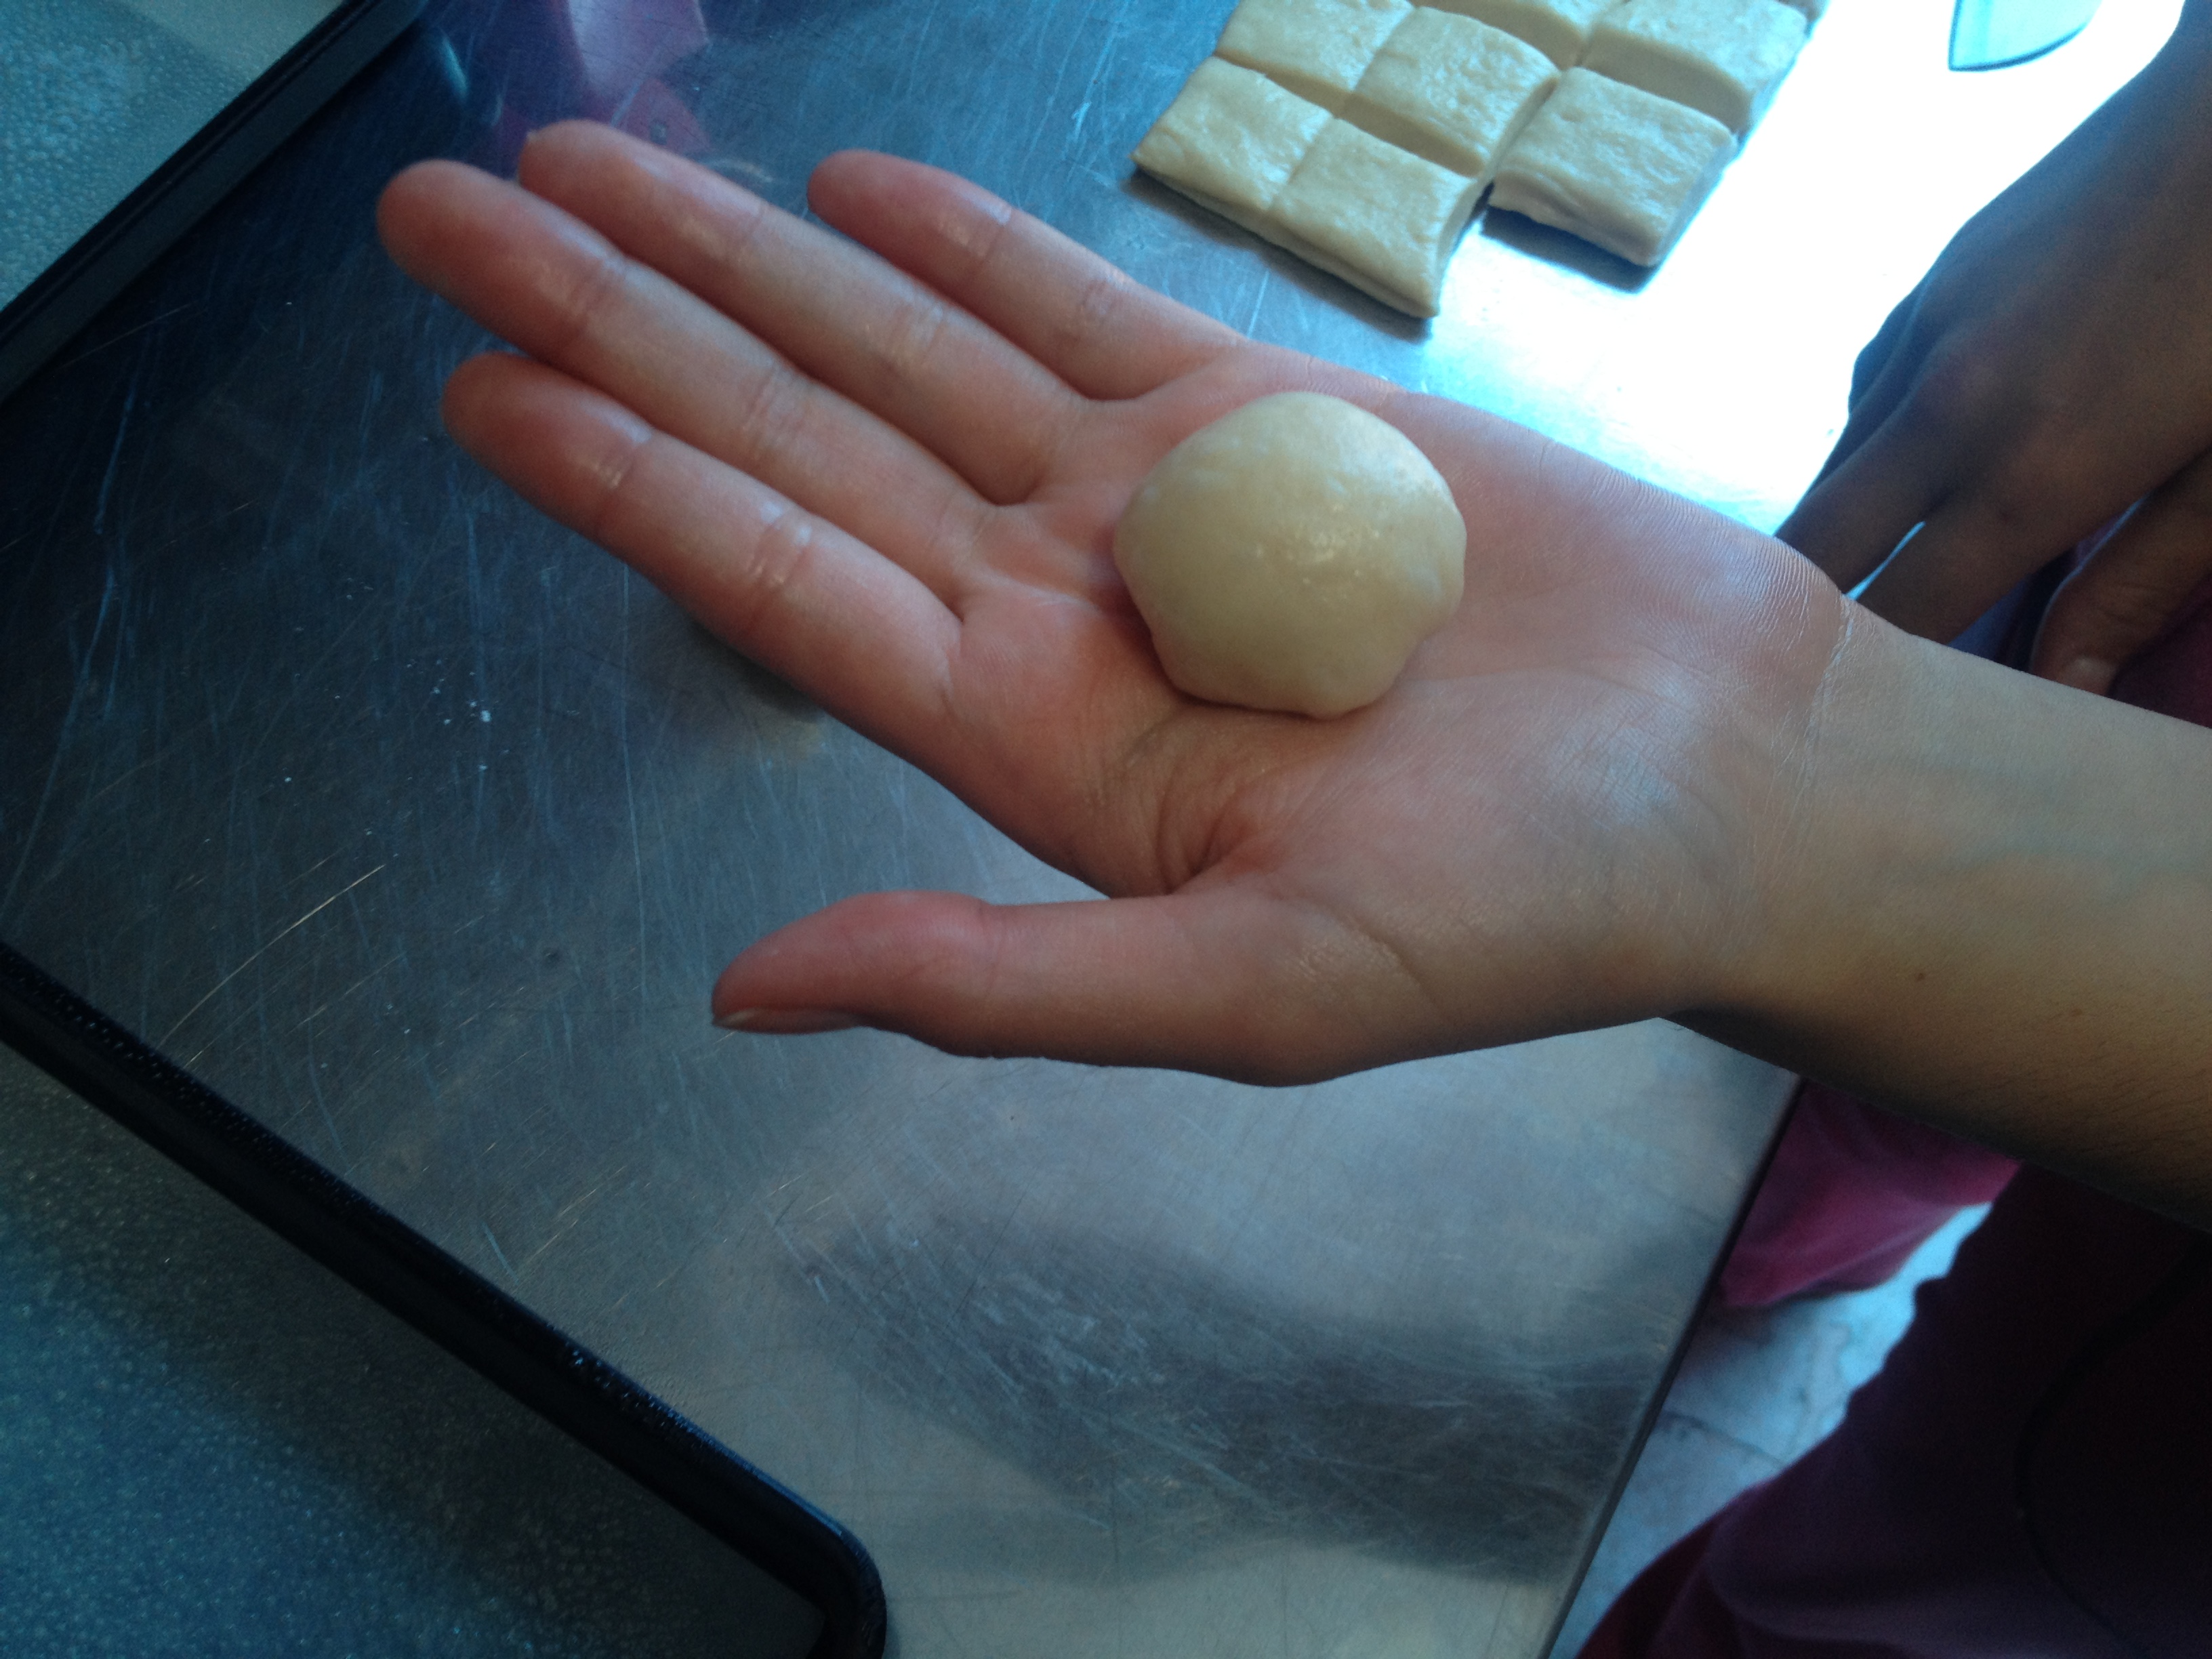
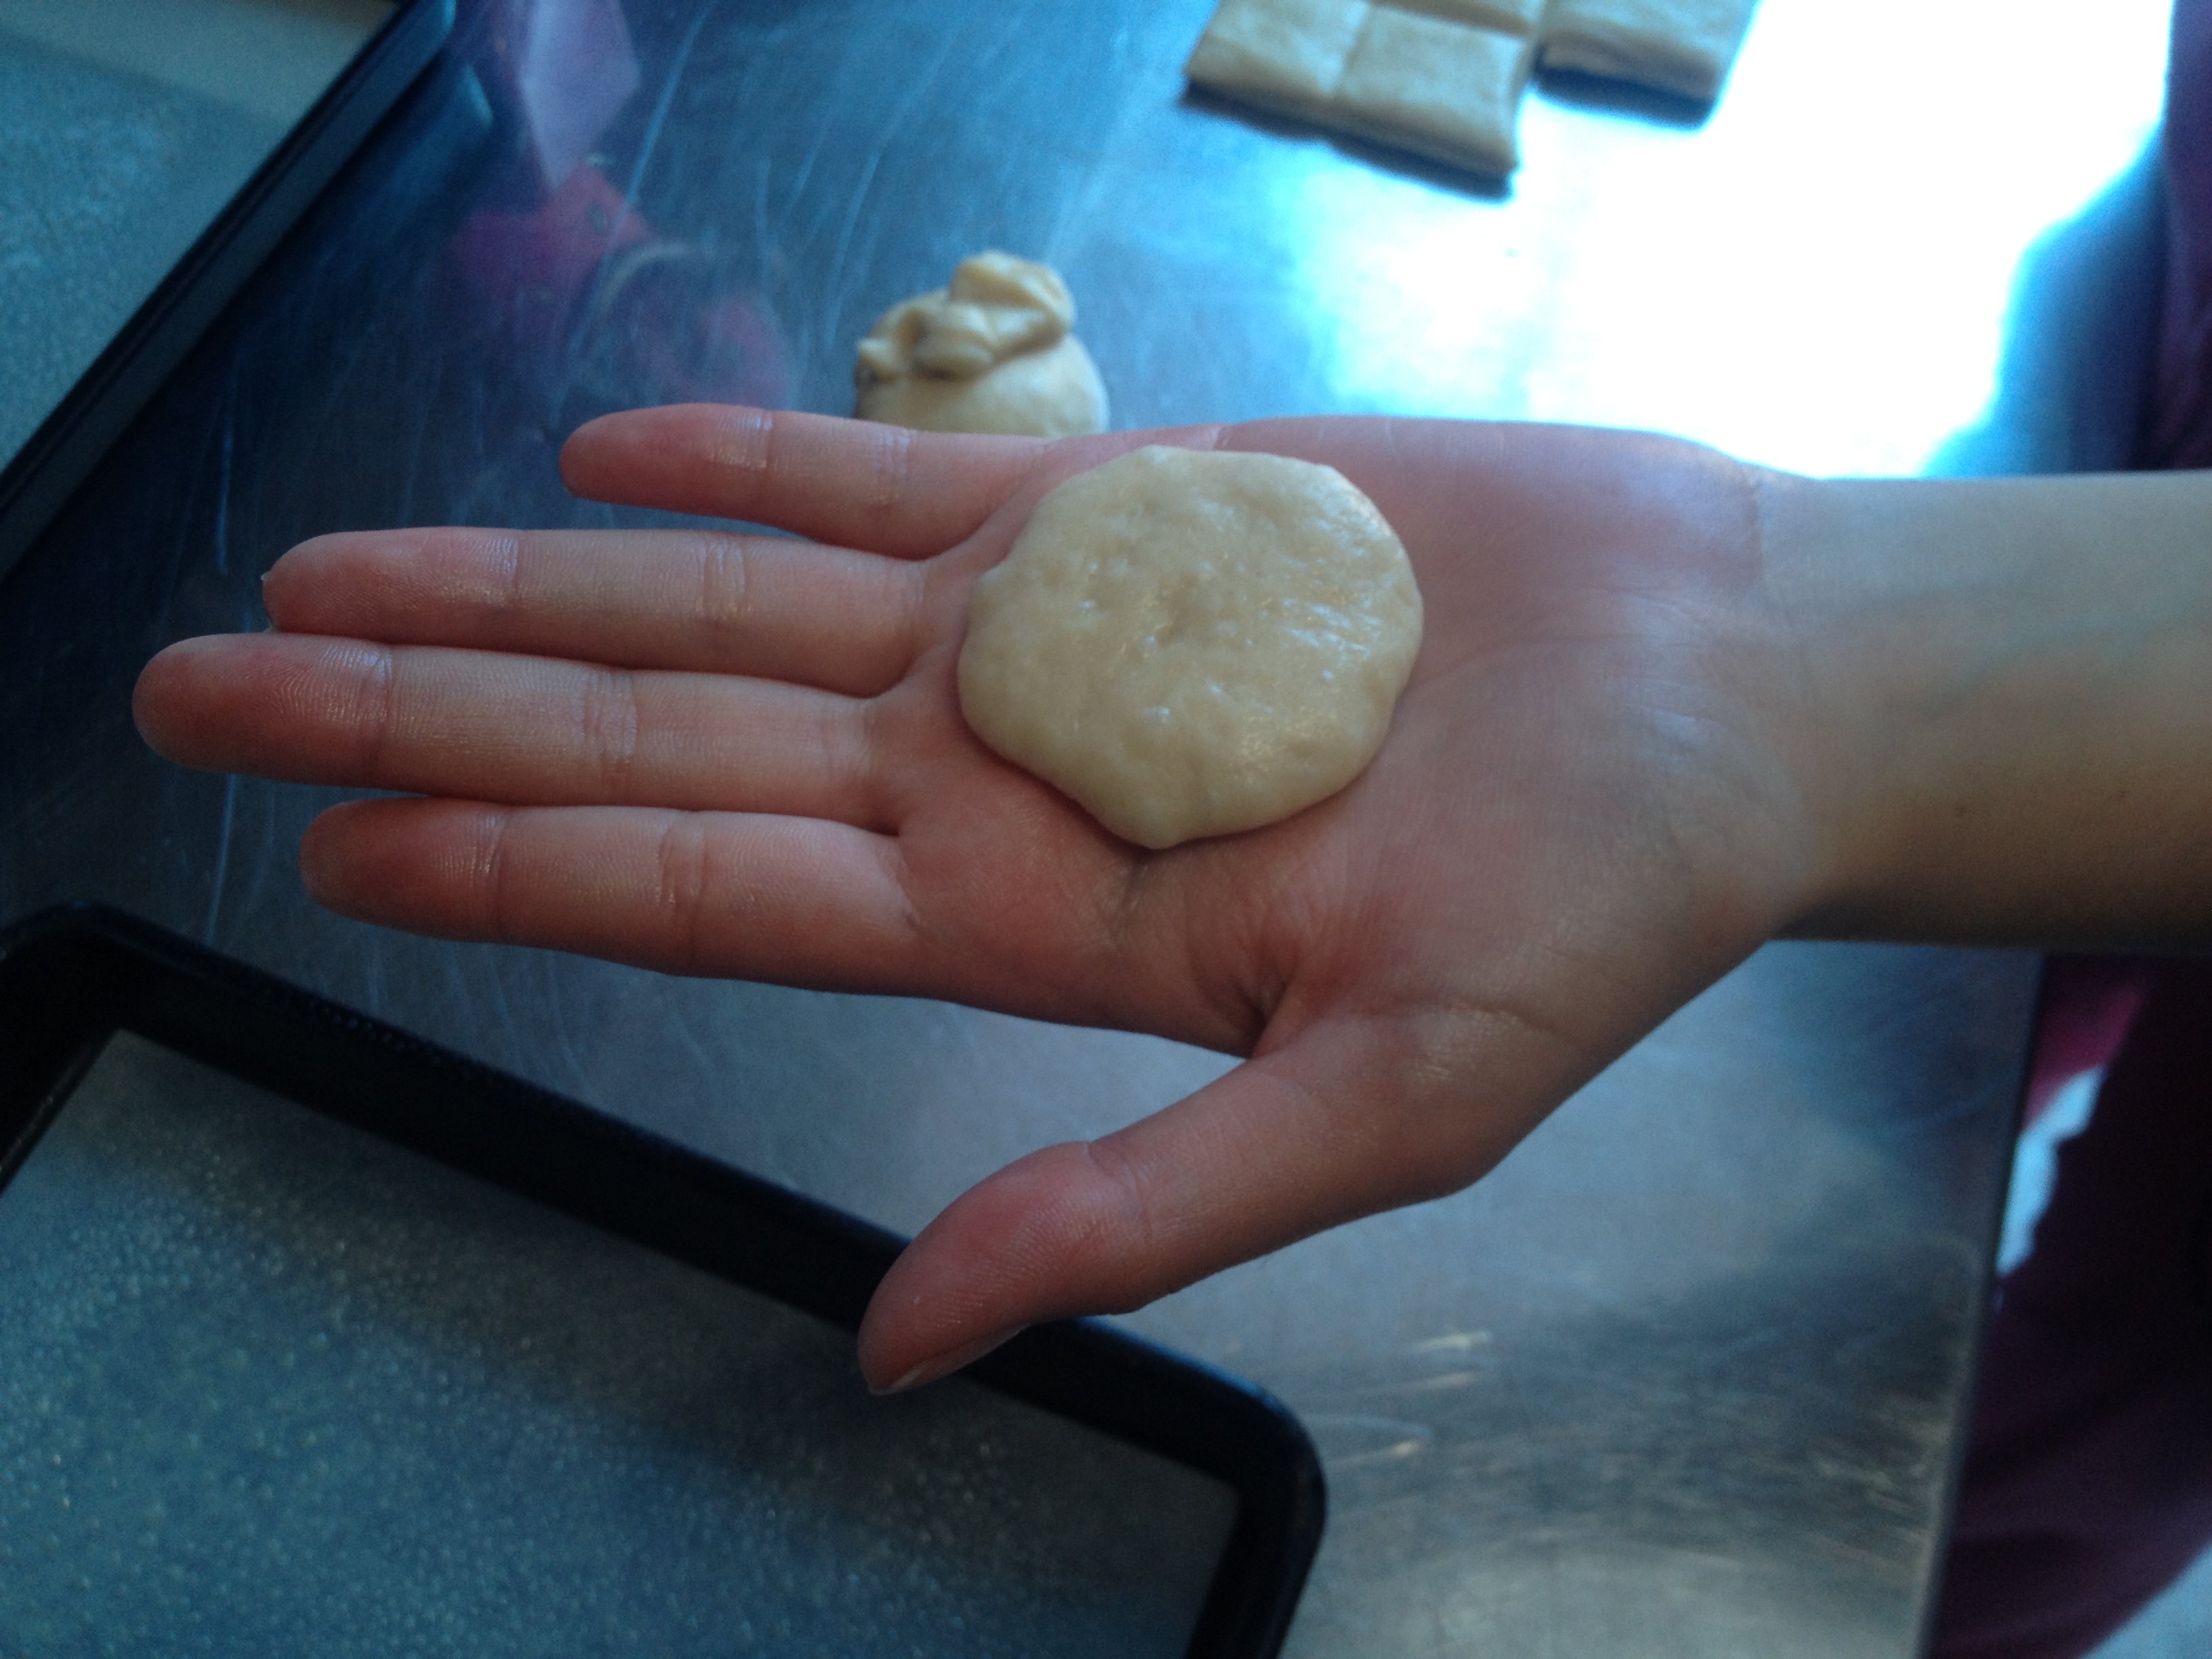
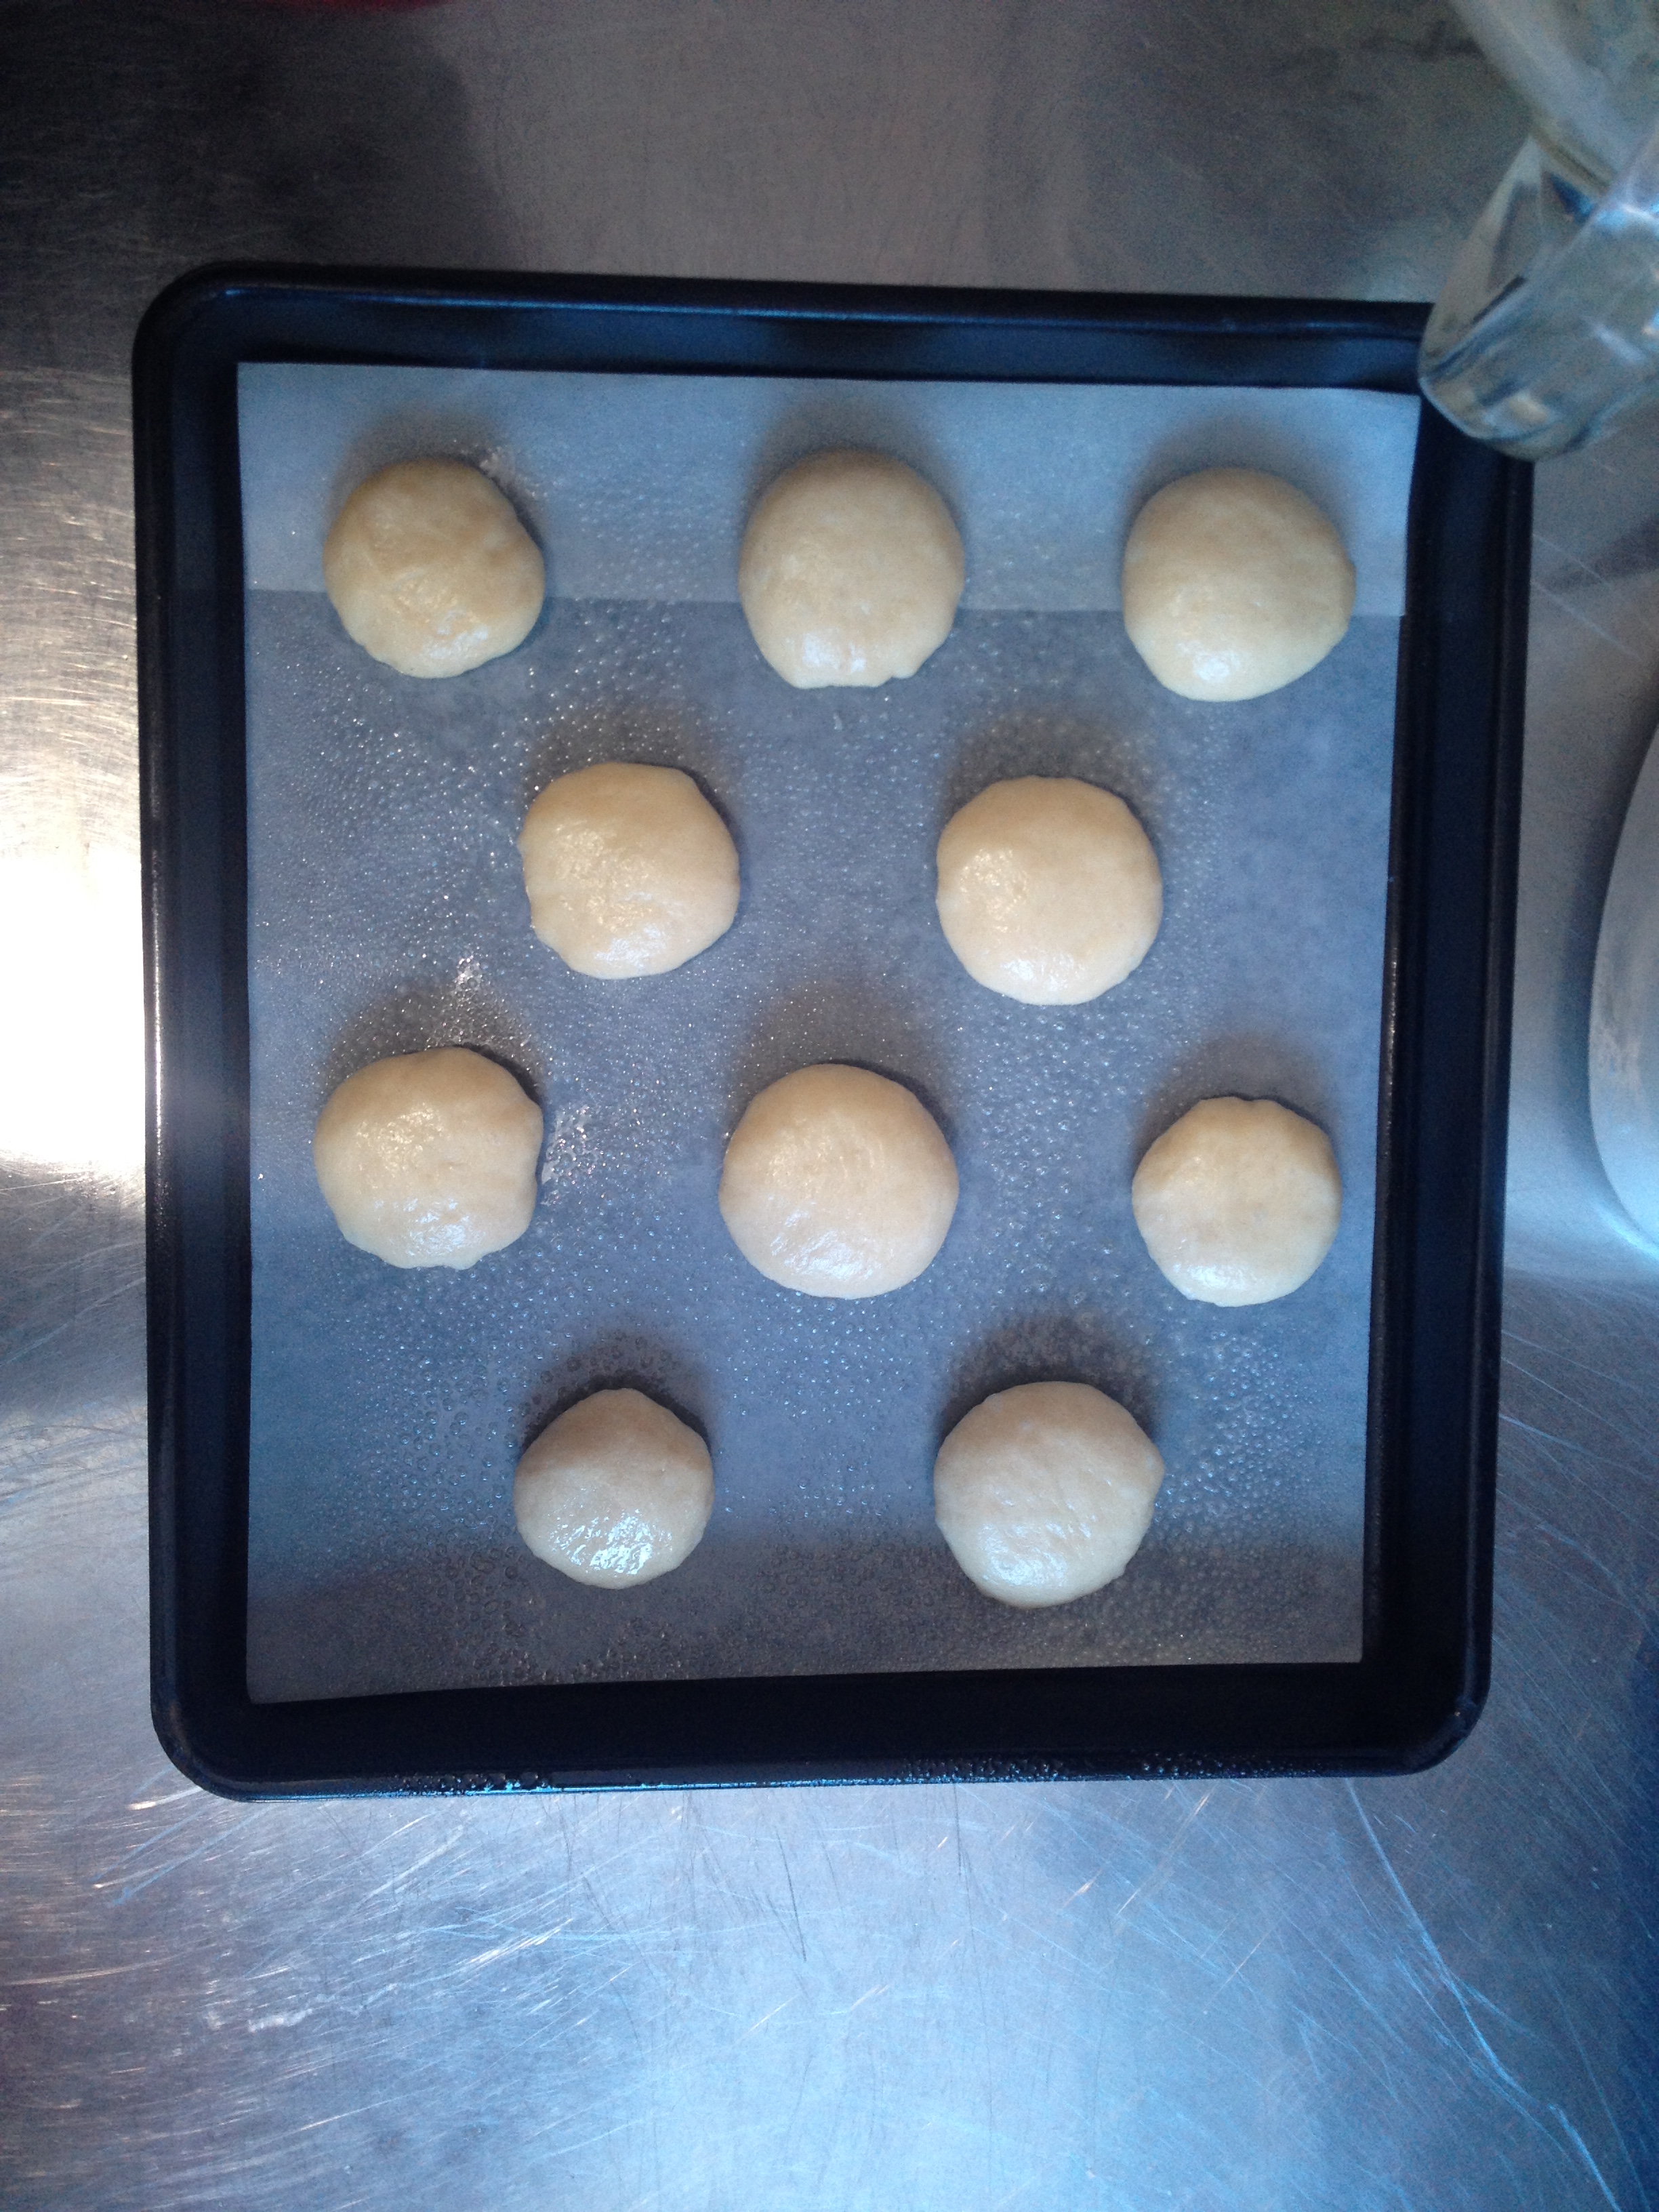
8.- Amasa un poco la masa (válgame la redundancia) para desinflarla bien. Divide en porciones pequeñas y haz bolitas (más o menos del tamaño de una pelota de golf). Aplasta las bolitas y colócalas en una bandeja de horno con papel encerado, harina o cualquier método para que no se peguen.

9.- Deja reposar media hora o hasta que hayan duplicado su tamaño (otra vez).

10.- Barniza con la yema y espolvorea ajonjolí al gusto.

Ten mucho cuidado cuando barnices los panes. En éste momento son muy frágiles, y si los desinflas, a la hora de hornearse van a quedar… pues… desinflados.

11.- Hornea a 180°C o hasta que los panes estén dorados de la parte de arriba.

12.- Deja enfriar y corta a la mitad, horizontalmente. La parte de arriba debe ser un poco más grande.

Si eres un flojo como yo y te rehusas a pesar tus panes para que todos queden exactamente del mismo tamaño, puedes hacer lo que hice yo: aplanar la masa, formar un rectángulo y cortarlo en cuadrícula. Luego formas una bolita con cada cuadrito ¡y listo!… No quedan todos del mismo tamaño pero… más o menos.

Como éstos panes son muy pequeños, es ideal que no varíen tanto los tamaños. Si no puedes hacer todas tus bolitas iguales, ni aunque tu vida dependiera de ello (como yo) por lo menos sepáralas en bolitas más grandes y bolitas más chicas, y hornéalas en dos tandas (o tres, o cuatro).

IMG_4157IMG_4158IMG_4160IMG_4162IMG_4164IMG_4166

Carne:

Si vas a hacer la carne desde cero, sólo mezcla todos tus ingredientes,excepto cualquier tipo de sal, ésa va justo antes de cocinar la hamburguesa.

1.- Mezcla los ingredientes en un bowl.

2.- Mójate un poco las manos y haz bolitas de carne, luego aplástalas para darles la forma. Ten el cuenta el tamaño de tu pan. Dales el tamaño que quieres desde el principio. Sazónalas con sal justo antes de ponerlas en la sartén.

3.- Calienta aceite en una sartén a fuego medio, y cuando empiece a humear ligeramente, coloca tus hamburguesas. No las aplastes. Para que no que encojan, pícalas con la punta de un cuchillo, varias veces, y hasta tocar la sartén.

4.- Cuando estén listas, retíralas de la sartén y déjalas descansar un rato en una servilleta o toalla de papel, para remover el exceso de aceite.

Si quieres ponerles queso, en cuanto la parte de abajo esté lista, dale la vuelta a la carne y coloca el queso arriba, para que se derrita.

Ensamble:

Realmente no sé si es necesario indicarles cómo ensamblar una hamburguesa, porque pues…no hay reglas.

Si te gusta el pan caliente, pon ambas caras con el corte hacia abajo en la sartén un par de minutos antes de ensamblar tu hamburguesa.

Si quieres mi opinión al respecto (y no viste ninguno de los videos que cité al inicio) es una buena idea variar con los ingredientes de las hamburguesas.

* Es decir, usar varios tipos de carne (pollo, pescado, cerdo, venado, caballo, pavo real, cisne, conejo, camarón, langosta o cualquier carne que sea legal en tu país),

* panes fuera de lo común (como chapata, bagel, focaccia, bolillo, telera, sour dough o cualquier locura con la que tu panadería local haya salido ésta semana),

* varios tipos de salsas (BBQ, mostaza de dijón, aderezo ranch, vinagretas, mermeladas, mantequilla de cacahuate, pesto, la mejor salsa de tu abuelita, o lo que sea que encuentres en tu refrigerador),

* quesos interesantes (mozzarella, queso crema, mascarpone, parmesano, queso de rancho, quesorpresa, quesuave, cheez whiz, chihuahua o lo que haya en tu quesería más cercana),

* y al último, guarniciones originales (encurtidos de verduras, huevo estrellado, papas a la francesa, cebolla caramelizada, una sandía pequeña {de 8 kilos}, o cualquiera de esas cosas hechas de verduras que venden  en los supermercados caros).

11087838_10153669359218496_780591210_o 11087266_10153669359388496_1723971469_o 11086733_10153669359303496_1562751573_o

English Version

The story for this recipe is very simple: I saw it on Tumblr and I liked it. Apart from that, this one won the Mini Hamburgers VS Red Velvet Soufflé war when I posted about it on Facebook some days ago.

So, here’s a vídeo that’ll get you thinking on how to give your burgers a twist; and another one if you want to make your own pickles. Now, if you Really like burgers, here’s the link to Burger lab, a show by Tasted which features the making of some amazing burgers. The fact that it’s no longer produced is a real shame, but I know you’ll enjoy the episodes in existence.

The most complicated thing in this recipe is the bread. The dough is called Brioche, and it’s, in my opinion, the most complicated dough of them all. It’s very rich and, because of that, very sticky. If you have no previouse expirience in bread-making, I recommend you buy some other kind of buns that fit the purpose.

Ingredients:

Buns:

  • 1 Cup of flour (depending on the weather, you can use up to 2 cups)
  • 1/3 cup powdered milk
  • 1 egg
  • 45 ml milk
  • 45 ml water
  • 1 tsp butter
  • 2 tsp olive oil
  • 1 tsp salt
  • 1 Tbsp sugar
  • 1 Tbsp yeast
  • Sesame seeds, to taste
  • 1 yolk to brush the tops of the bread

Patties:

  • 1/4 kg ground beef
  • 1/4 kg ground pork
  • Finely chopped onion, to taste
  • Finely choped herb of your preference
  • Salt to taste
  • Pepper, to taste

I reccomend doing this from scratch. Frozen patties are not very high quality, and they may not re-shape as well.

Be sure to get good quality meat, not lean, with a high fat content. Fat means more flavor.

Garnishing:

  • Pickles
  • Ketchup
  • Mustard
  • Mayonaise
  • Onions
  • Cheese
  • Tomatoes
  • Lettuce

You can obviously use whatever floats your boat.

Instruccions:

Buns:

1.- Warm the milk up to 60°C, add the butter and the sugar

Don’t warm the milk up any higher than 60°C, it will kill the yeast.

2.- Add the sugar and mix well.

3.- Add the yeast and let the mixture rest for 5 minutes.

4.- In another bowl, mix the powdered milk, salt and flour.

5.- Add the egg, the yeast mixture and mix. You can do this by hand or in a stand mixer.

6.- Drizzle the olive oil and knead the dough for about ten minutes, or until it’s smooth and unsticks itself from your hands.

Remember, this dough is very sticky, so you’ll have to judge if it’s done from how smooth it is..

7.- Drizzle a bit more olive oil in a bowl and place your dough there. Brush the though with oil to prevent it from forming a crust. Leave this on a warm place with no air currents for two hours or until doubled in size.

8.- After it has risen, knead the dough well to take the air out. Divide the dough in small portions and make balls the size of a golf ball. Line them separately on a baking sheet with flour, non-stick spray, parchment paper or whatever no-sticking method you want.

9.- Let the dough rest again until it’s doubled in size (again).

10.- Brush the top of the bread with the egg yolk and sprinkle on some sesame seeds.

Be careful not to poke the bread. It’s a bit fragile in this state. If it deflates it will turn out… Well… Flat.

11.- Bake at 180°C for 10 minutes or until golden brown on top.

12.- Let cool completely and slice horizontally.

If you’re as lazy as me, and won’t weigh your dough pieces so all of them are the same size, you can do as I did: flatten your dough in a rectangle form and then cut squares. I’m not sating my squares were the same size, but that’s the easiest way to separate your dough.

Becausde this buns are so tiny, it’s best not to vary too much in sizes when you bake. You can do as I did and separate the tiny ones from the teeny-tiny ones, and bake in two battches. Or three. Or four.

IMG_4157IMG_4158IMG_4160IMG_4162IMG_4164IMG_4166

Patties:

1.- Mix all the ingredients but salt, in a bowl.

2.- Wet your hands before forming each patty, form a little ball and flatten it out. Keep the size of the buns in mind. Season the meat just before it goes on the pan.

3.- Heat enough oil in a pan, and when it starts smoking lightly, add your patties. poke them with a knife all the way down to the pan to keep them from shrinking. Flip and add cheese if you want it to melt on top.

4.- When done, let rest for a while on a paper towel to get rid of the excess oil.

Ensamble:

I’m not sure if it’s really necessary to teach you how to put together a hamburger… so…

If you like to toast your bun, put it cut face down on the pan a couple minutes before you’re ready to eat your burger.

If you want my opinion on the subject (and did not bother to check out any of the videos I cited above), I think it’s a good idea to vary with the ingredients on a burger.

* I mean, use various types of meat (Beef, pork, chicken, fish, shrimp, goose, rabit, horse, swan, shrimp, lobster or whatever’s legal in your country),

* maybe some different types of bread (chiabatta, baguette, white bread, whole wheat, sourdough),

* various kinds of sauces (BBQ, ranch dressing, dijon mustard, peanut butter, jam, your grandma’s famous pasta sauce),

* interesting cheeses (roquefort, mascarpone, emmental, parmesan),

* and lastly, some other add-ons (pickled vegetables, french fries, a sunny-side egg, a watermelon [a tiny one, about 10 pounds], or any of that fancy vegetable salads they sell on glass bottles at the supermarket).

11087838_10153669359218496_780591210_o11087266_10153669359388496_1723971469_o11086733_10153669359303496_1562751573_o

“Colchones” en 30 minutos! / 30 minute dinner rolls!

Click for the english version

“Colchones” de 30 minutos

Hace frío en la Ciudad de México. Me choca el frío. Por una de varias razones: hacer pan es más difícil cuando se está a 7°C. Por eso quise hacer ésta receta inmediatamente después de haberla encontrado en Pinterest (original aquí) (está en inglés). Toma muy poco tiempo (para tratarse de pan), y no es necesario amasar tanto como con los panes comunes y corrientes. Es hermoso. Claro, mi hermano se burló de mi, llamando a mis panes “colchones Bimbo”… Y pues ¿Que quieren? Si, es el mismo tipo de pan.

Así que… ¿cuál es el secreto? Simple. Éstas cosas llevan el doble de levadura que un pan normal. Pero no se preocupen por eso… saben muy bien. Si no, no les estaría compartiendo la receta. Sólo que cabe mencionar dos cosas:

1.- La receta original dice que el tiempo de preparación es de 30 minutos. Yo me tardé como una hora, un poquito menos. Bueno, sigue siendo bastante rápido comparado con las 3 horas que me puedo tardar con éste frío.

2.- La mía está ligeramente alterada, tanto en la cantidad de agua, como en la de sal y el tiempo de horno. A mi me funcionó mejor de ésta manera. Así que, bueno, empecemos.

Ingredientes:

  • * 3/4 de taza de agua tibia (entre 30 y 60°C)
  • * 1/3 de taza de aceite (yo usé de oliva. Se puede cambiar por aceite de cocina o mantequilla derretida)
  • * 2 cucharadas de levadura
  • * 1/4 de taza de azúcar
  • * 1 cucharadita de sal
  • * 3 1/2 tazas de harina (se necesitará un poco más para amasar)
  • * 1 huevo

Preparación

Dependiendo de tu horno, puedes precalentarlo antes de empezar a preparar el pan, o en alguno de los tiempos de espera. Depende de qué tan rápido vaya a llegar a 400 °F, o 200°C.

1.- Mezclar el agua, azúcar aceite y levadura en el bowl de la batidora (imagino que también se puede hacer a mano). Dejar reposar 15 minutos.

2.- Mezclar la harina con la sal.

3.- Agregar el huevo y la mitad de la harina. Mezclar con el gancho de la batidora (o a mano). Agregar poco a poco el resto de la harina.

Si la mezcla está muy seca, agrega agua poco a poco.

4.- Dividir la mezcla en 12 porciones iguales y formar bolitas. Colocar en un molde rectangular (idealmente, de 23 X 33) engrasado. Dejar reposar 10 minutos.

5.- Hornear 15 minutos o hasta que doren en la parte de arriba.

Opcional: puedes untarles a los panes mantequilla derretida justo al salir del horno. Yo no lo hice, pero quedan muy bien.

IMG_3339

La mezcla de levadura, agua azúcar y aceite primero.

IMG_3340

La mezcla de levadura, agua azúcar y aceite después.

IMG_3343

Antes de reposar 10 minutos.

IMG_3344

Después de reposar 10 minutlos.

IMG_3345

Se inflan bastante, ¿no

IMG_3350

Así se ve uno solo.


English version

30 minute dinner rolls

It’s cold. I don’t like the cold. Why? Well, many reasons. One of them is that it’s harder to bake bread when you’re at 7°C (and I know for some of you english-speaking folk out there, maybe that’s not cold at all, but when you grow up in Mexico City, it is very cold). So that’s why I wanted to make this recipe inmediatly after finding it on pinterest (originial here). This recipe takes little time (at least where bread is concerned), and it’s not necessary to knead as much as it is with regular kinds of bread. It’s beautiful.

So, what’s the catch? Well, it uses twice as much yeast as other kinds of bread. Don’t worry. It’s not over-yeasty tasting. I wouldn’t post it if it was. Just, two things are worth mentioning:

1.- This recipe is called 30 minute dinner rolls… But it took me little less than an hour to make them. Maybe I’m just slow. I don’t know. Still, that’s really quick compared to the 3 hours you take to make other breads when it’s cold out.

2.- I altered the original amounts of salt, water and oven time. It worked better for me this way. Feel free to alter it yourself.

Ingredients:

  • 3/4 cups warm water (30 to 60 °C)
  • ⅓ cup oil (either olive oil, cooking oil or melted butter will work)
  • 2 tablespoons active dry yeast
  • ¼ cup sugar
  • 1 teaspoon salt
  • 1 egg
  • 3½ cups flour (a bit more will be needed for kneading)

Instructions:

  1. Preheat oven to 400 degrees.

    Depending on how fast your oven heats up, you’ll want to preheat it before beginning, or after the first or second waiting times)

  2. In the bowl of your stand mixer (it can be done by hand too), combine the warm water, oil, yeast, and sugar. Allow the mixture to rest for 15 minutes.
  3. Mix 2 cups of the flour, the salt, and the egg into the yeast mixture using a dough hook, your hands or a wooden spoon. Add the remaining 1½ cups flour ½ cup at a time.

    If the mixture seems dry, add water little by little.

  4. Shape dough into 12 balls and place in a 9×13-inch greased pan. Let dough rest for 10 minutes.
  5. Bake for 15 minutes or until tops are golden brown.

Optional: You can brush the tops of the bread with melted butter just as they come out of the oven. I didn’t do it, but they come out nicely if you do so.

IMG_3339

The yeast, oil, water and sugar mixture before.

IMG_3340

The yeast, oil, water and sugar mixture after.

IMG_3343

Before resting 10 minutes.

IMG_3344

After resting 10 minutes

IMG_3345

They puff up quite a bit, right?

IMG_3350

And this is how one of them looks on it’s own.

Una canasta de pan / A bread basket

Click for the english version

¿Acaso no aman a esa gente súper ingeniosa que te responde así?:

– ¿Me regalas un vaso de agua?
– No tengo vasos de agua, pero te puedo dar un vaso con agua.

¿No los aman? ¿No? Yo tampoco. Se creen muy inteligentes y muy chistosos. Pero no.

Cuando uno dice “Un vaso de agua”, se está usando una cantidad (muy ambigua) de medición de volumen. No se dice “Un litro con agua” sino “un litro de agua”. Bueno. Con los vasos es lo mismo.

¿A qué viene todo ésto? Pues, a que ésta canasta de pan, realmente es una canasta hecha de pan. De ahí, pues… No, mi introducción no tiene nada que ver.

La historia tras éste post es bastante sencilla. Hace unos días, en Pinterest, encontré un Pin de 25 ideas para canastas de regalos, y bueno, aunque no me encantaron las ideas de dichas canastas, realmente me dieron ganas de darle a alguien una canasta de regalos. El problemas es la canasta. Yo no trabajo, por lo tanto dependo del dinero que mis padres me dan, así que no pienso comprar una canasta. Sale más barato hacerla con harina.

Ésta receta viene del post que hay en Namiotl. Ésta es una traducción del original, que está en polaco. No se ustedes, pero yo no hablo polaco. Así que, a menos que de verdad les interese, yo me quedaría con la receta que hay en éste blog, porque la traducción es de Google translate, y es algo mala.

Aquí está la imagen original.

IMG_2838

La masa puede hacerse a mano o en batidora. Yo la hago en batidora porque eso de la panadería a mano no se me dan tan bien como yo quisiera.

Canasta de pan

Ingredientes

IMG_2886

  • 4 tazas de harina (si la masa se pega mucho, agregar 1/2 taza más)
  • 1 huevo
  • 1 cucharada de levadura seca
  • 1/2 taza de agua tibia
  • 1/2 taza de leche
  • 1/4 de taza de azúcar
  • 1/4 de taza de aceite de oliva
  • 1 huevo para barnizar
  • 1/2 cucharadita de sal


Preparación

1.- Mezclar 1 cucharada de azúcar con el agua, disolver y agregar la levadura. Dejar reposar un par de minutos.

El agua debe estar entre 30 y 60°C, para activar la levadura. Si está más fría, la levadura no se activa. Si está más caliente, la levadura muere. Aquí hay un tip, si tocas el agua, y en algún momento es doloroso, el agua está muy caliente. Y pues… si se siente fría, está fría.

IMG_2661

Así se ve la levadura cuando se activa ^u^

2.- Mezclar el resto del azúcar con harina y sal.

3.- Agregar la mezcla de levadura, mezclar.

4.- Agregar el huevo y la leche. Incorporar perfectamente.

5.- Agregar aceite de oliva y amasar durante unos minutos, hasta que la masa esté lisa y tersa.

Tratándose de otros panes, yo recomendaría agregar más leche (o el líquido usado en el pan) para que la masa estuviera lo mejor hidratada posible, pero en éste caso, sirve que la masa sea un poco más seca, para que la canasta sea más consistente, y no tan ligera.

6.- Aceitar un bol con aceite (válgame la redundancia) de oliva. Cubrir la parte de arriba de la masa con aceite para que no haga costra. Dejar la masa reposando en un lugar cálido sin corrientes de aire (microondas u horno, apagado, obviamente), hasta que doble su volumen (de una a dos horas).

IMG_2887

Primero -.-

IMG_2888

Después :O


Oh, si. Ahora viene lo divertido.

Primero que nada, en el post original, usan un bol de vidrio apto para horno. Son los que están hechos de vidrio Pyrex. Se cubre con aluminio y se usa sin problemas, pero claro, yo soy súper lista y usé uno de los moldes de Wilton para hornear pasteles en forma de media esfera, engrasado y enharinado. Si me lo preguntan, creo que el bol de vidrio forrado de aluminio es una mejor idea. A la hora de desmoldar la canasta, imagino que es más fácil sólo desprender el aluminio. 

Y bueno, después de pasar horas pensando en cómo explicar éste proceso, creo que es más fácil que lo entiendan con las fotos. Y si, soy una floja.

Hornea la masa 15 minutos a 180°C, hasta que el pan dore. Debes saber que es muy probable que la parte de arriba (que al armar es la de abajo) dore más que la de abajo (que al armar, es la de arriba).

IMG_2889

Extiende la masa con un rodillo y corta tiras largas.

IMG_2890

Empieza con tres tiras de base. Si tu bol es más grande, agrega más tiras.

IMG_2892

Tiras en medio de las tiras. Aplana el centro con un vaso o algo así.

IMG_2894

Ahora, las tiras horizontales van entrelazadas. Si no se pegan bien, ponles un poquito de agua.

IMG_2895

Awww, que bello. Barniza con huevo antes de hornear.

IMG_2896

Haz dos trenzas. Una para el borde de la canasta, otra para el asa. Olvidé la foto del asa. Sólo coloca la trenza en un bol igual al que usaste para la canasta, para que agarre forma en el horno.

IMG_2897

Es importante que el borde de la canasta sobresalga del borde del molde, el pan va a crecer. A mi me quedó chico y siento que se ve un poco extraño.

IMG_2899

Al final, las partes se unen con palillos.


Bien. Ahora que ya tienes una canasta muy bella y comestible, puedes llenarla con un queso que se vea caro, un salami que también se vea caro, y una de esas micro botellitas de vino de 180 mililitros, y regalársela a alguien. Te verás muy bien. Y, como la canasta es barata de hacer (en especial si eres codo y sustituyes el aceite de oliva por aceite de maíz o algo así), puedes invertir más en lo que sea que la vayas a rellenar. Yo la rellené de panes. Oh si. Es una canasta de panes hecha de pan.

IMG_2900

De cerca, para que se vea épica.

IMG_2898

En el comedor, obvio.

IMG_2901

Épico, épico mil.


Enlgish version

A bread basket

The story behind this post is quite simple. Browsing Pinterest a Few days ago, I found a 25 gift basket ideas post,and well, even thought I didn’t really love those gift basket ideas, it really made me want to give someone a gift basket. The only problem is the basket itself. I don’t have a job, and I only have the money my parents give me, so I’m not buying a basket. It’s way cheaper to make one out of flour.

This recipe’s out of Namiotl. This is a translation of the original post, which is in Polish… I think. Now, I don’t know about you, but I don’t speak Polish. So, unless you’re really interested, I’d stick with the recipe in this blog, because the original is Google translated, and it’s kind of a bad translation.

This is the original image.

IMG_2838

You can make this dough by hand or in an electric mixer. I make mine by mixer because this bread baking thing is not exactly my strongest skill. I wish it was, though.

Bread basket

Ingredientes

IMG_2886

  • 4 cups of flour
  • 1 egg
  • 1 Tablespoon active dry yeast
  • 1/2 cup lukewarm water
  • 1/2 cup milk
  • 1/4 cup sugar
  • 1/4 cup olive oil
  • 1 egg to brush the top
  • 1/2 teaspoon salt


Instructions

1.- Mix a tablespoon of the sugar in the water, disolve and add the yeast, set aside for a couple minutes.

Water must be 30-60°C. If it’s colder, the yeast won’t activate. If it’s warmer, the yeast will die. Here’s a tip for you if you touch the water and it hurts at any point, it’s too hot, even if you have to linger a while. And well, if it feels cold… then it’s cold.

IMG_2661

This is how yeast looks when it’s activated ^u^

2.- Mix the rest of the sugar with salt and flour.

3.- Add the yeast mixture and combine.

4.- Add the egg and the milk.

5.- Mix in the olive oil and knead the dough for a few minutes, until it’s smooth.

Now, if this was any other bread, I’d recomend adding more milk, (or whatever liquid was being used) so the dough would be as hydrated as possible, but in this case, the dough must be a little bit dyer, so the basket will have more consistency to it.

6.- Brush a bowl with olive oil and put in the dough. Cover the top of the dough with oil so it won’t form a crust. Leave the dough in a warm place whith no air currents to rest until it’s doubled in volume (1 or 2 hours). You can leave it in the microwave or the oven (off, oviously).

IMG_2887

First -.-

IMG_2888

Later :O


Oh yeah.  Now comes the fun part.

First of all, in the original post, they use an oven safe glass bowl. They’re made out of Pyrex. You can cover it with aluminum foil and use safely, but, of course, I’m such a smarty-pants I used one of the half sphere Wilton molds, greased and floured. If you ask me, the glass bowl is a better idea. When you have to unmold it, I imagine its much easier to just peel off the aluminum foil.

And well, after hours upon hours of thinking how to explain this proceidure to you, I decided the pictures are way clearer. And yes, I’m lazy.

Bake this dough at 180°C or 350°F, Until the bread is golden brown. You must know that the top part (which will be the bottom when put together) will brown more than the bottom part (which will be the top when put together).

IMG_2889

Roll out the dough with a rolling pin and cut strips.

IMG_2890

Start with three base strips. If your bowl is bigger, add more strips.

IMG_2892

Strips in the middle of the other strips. Flatten the top with a glass or something.

IMG_2894

Now, the horizontal strips go entretwined. If they refuse to stick, use a little water.

IMG_2895

Awww, how cute. Brush it with your egg before baking.

IMG_2896

Make two braids, one for the border of the basket and one for the handle. I forgot to take a picture of the handle. Just put your braid on top of a bowl like the one used for the basket, so it will aquire that form in the oven.

IMG_2897

It’s important for the dough to be bigger than the edge of the mold. Mine turned out a bit smaller and I think it looks kind of weird.

IMG_2899

Then, put it all together using toothipicks.


Well, now you have a beatiful, edible basket, you can fill it up with an expensive looking cheese and an expensive looking salami, and one of those micro 180 mililiter wine bottles and give it to someone. You’ll look really smooth. And, because this thing’s cheap to make (specially if you’re the cheap one and sustitute the olive oil with canola oil or something like that), you can invest more in whatever goes in it. I filled it with bread. Oh yeah. Its a bread basket made out of bread.